Let me start by saying I am not a professional knitting pattern writer! I’m doing some stash busting (probably better described as “scrap” busting) with my home spun wool (mostly DK to fingerling weight 11-14 wpi) after making socks and hats this winter. These are notes for myself but you are welcome to use them! I wanted some dog walking gloves (and chicken feeding gloves) that were able to allow me to use my fingers easier (but to cover my fingers for warmth when not actively in use doing something) and hence I created this fun design! A bit more functional l than previous designs I have made from other patterns I found on the web. Also a fun way to use up bits of scrap yarn (hey a lot of work goes into making that home spun yarn so I want to use every last bit of it! Lol)
Also let me note that this is not a beginner pattern! Firstly you will need to be able to adjust as you go for differing hand sizes! Second … cable designs take a bit of practice. Not hard, but you may want to try something like a cable design headband first. Third… I’m working with home spun yarn which varies in wpi between DK and fingerling so I have to adjust a bit for that as well. Lastly I’m not a profession knitting pattern writer so you may have to intuit some of what I’m instructing… especially since this is more a pattern for myself to remember how I did it so I can make more later if I want to! Consider it like this: you have the privilege of reading my personal knitting journal of notes to myself lol.
I recommend you read all the way thru the pattern before attempting it to make sure it makes sense and is something you want to try yourself. Especially before committing your lovely homespun wool yarn!

Left glove
With size 7 double pin needles cast on 30 stitches. In blue yarn.
Rows 1-4 k1 p1
Switch to brown yarn.
Row 5 k3, on spare needle k3 and hold to the front. K3 from main needle. Pick up the 3 stitches from the spare needle and knit those 3 stitches. Knit to the end of the row.
Rows 6-8 knit
Row 9 k9. K3 to spare needle and hold to the back. K3. Pick up 3 stitches from spare needle and knit those 3 stitches. Knit to the end of the row.
Rows 10-12 knit
Repeat to you get 5” from bottom edge.
This is where you begin the thumb hole. You will stop knitting in the round. Slip the first stitch for each row for the next 8 rows … purl and knit as appropriate while keeping in the same cable pattern as before as you go. I’m the 9th row rejoining to knitting in the round. I suggest taking a moment to stop and write down where you are in your pattern so you can easily continue. For me one my first glove it was as follows;
Row 1 slip, purl to the end
Row2 slip, k2, k3 on spare needle and hold to the front, k3, pick up 3 stitches on spare needle and knit 3 stitches. Knit to the end.
Row 3 slip, purl to the end
Row 4 slip, knit to the end
Row 5 slip purl to the end
Row 6 slip k2, knit 9, k3 on spare needle and hold to the back, k3, pick up 3 stitches on spare needle and knit those 3 stitches. Knit to the end.
Row 7 slip, purl to the end
Row 8 slip knit to the end and rejoin knitting in the round to begin row 9
Starting row 9 you will discontinue the cable pattern and work straight knit stitches from here forward unless otherwise indicated.
Rows 9-12 knit
Switch to blue color yarn and knit for 2” in k1, p1 pattern.
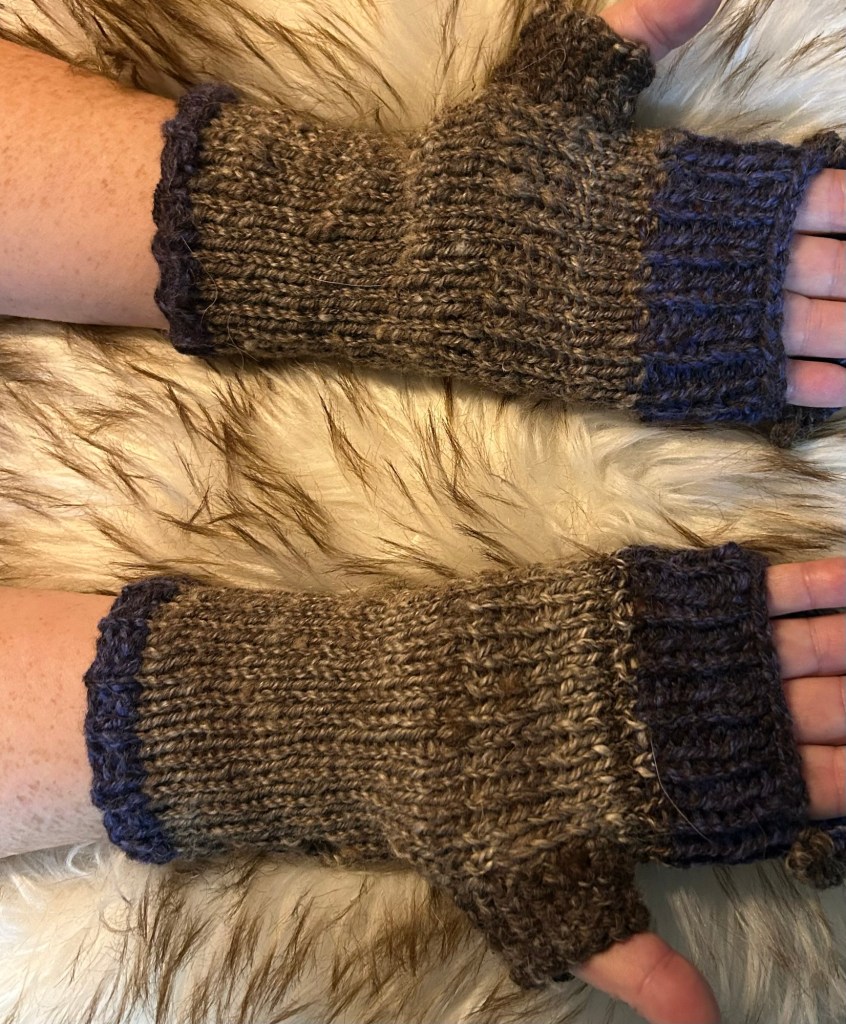
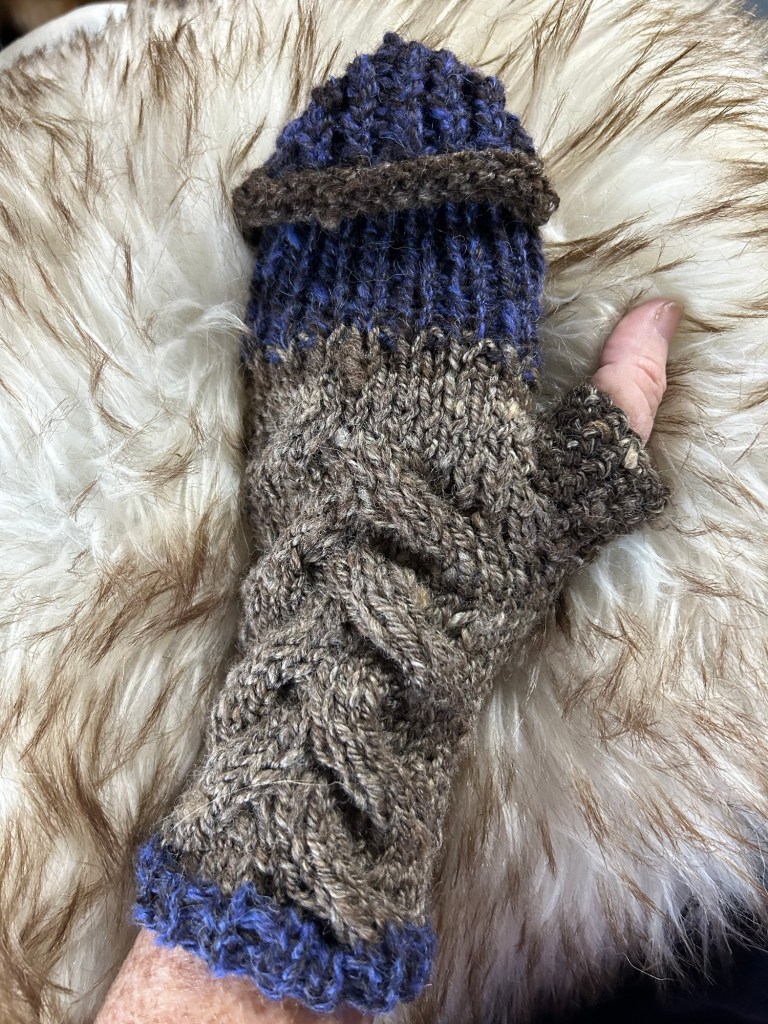
Your glove should now look like this
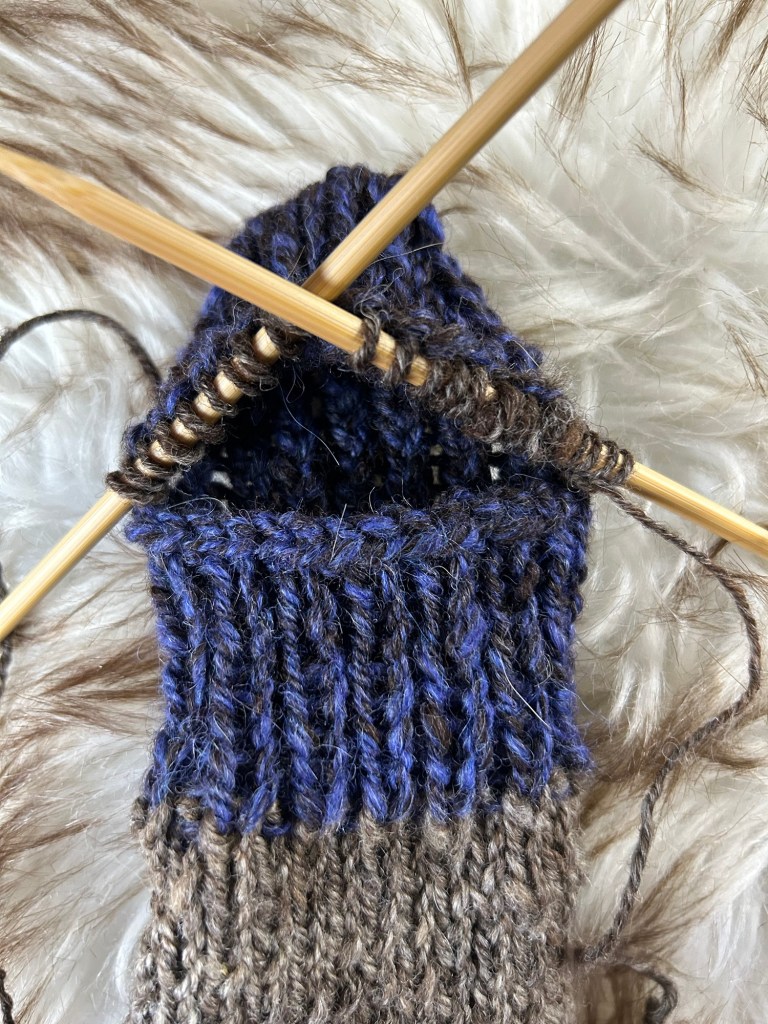
Next we will be making the finger flap and finishing off the mit part of the glove. Start by rearranging the stitches on your needles so the last 15 stitches (1/2 of the stitches) are on one needle. You will be casting these off and the treating them back on to make a finger flap.
Row 13 k1p1 (15 times), cast off 15 stitches
Row 14 k1p1 (15 times), cast on 15 stitches joint back in the round.
Row 15- 18 k1p1. Place a stitch marker at the half way point between stitch 15 & 16.
Row 19 slip,k1, psso, stay in the k1p1pattern till 2 stitches before stitch marker and k2tog, slip marker. Slip, k1, psso stay in k1p1 till 2 stitches to the end the K2tog.
Once you get down to 10-12 stitches total try the glove on and see if you need to add a few extra rows for length of fingers. Otherwise use Kitchener stitch to bind off. Each persons hand is a bit different so it’s best to try on as you go. For me I added one extra row for length and then Kitchener stitch.
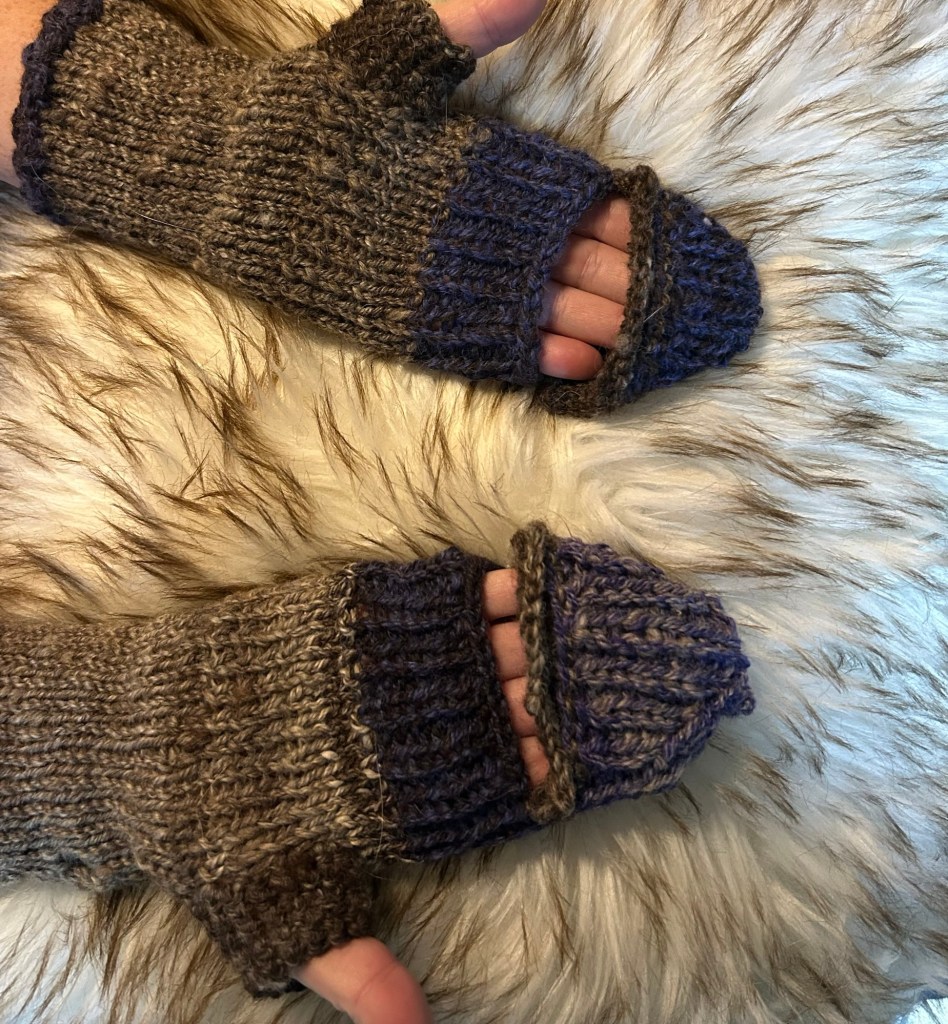
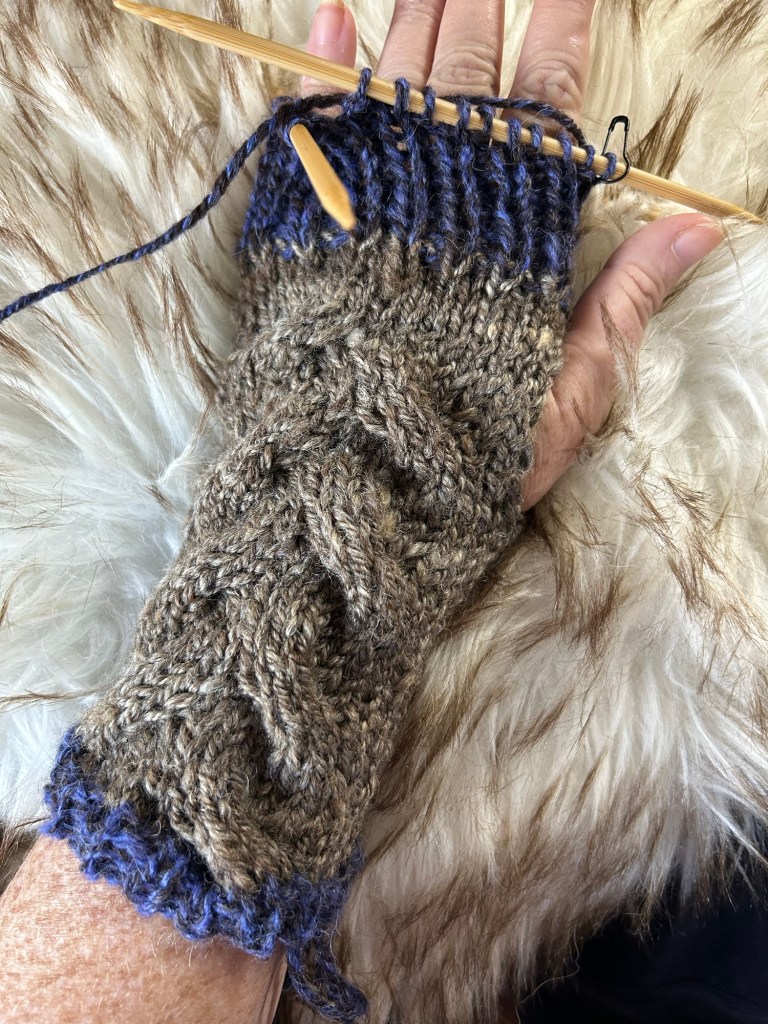
This is what your glove should look like so far.


Next we are going to add some length to the finger flap area. Pick up stitches evenly along the finger flap as shown in the photo.
Row 1 k2tog, knit to last two k2tog (this helps strengthen the corner of the finger flap area).
Row 2 purl
Row 3 cast off
Last but not least. I crochet around the thumb hole for a half thumb length. The reason I crochet instead of knit the thumb hole is just personal preference in that I hate to knit small tubes in the round (gah!) but crocheting them isn’t as annoying to me lol so feel free to knit them instead.
Now to start the right glove
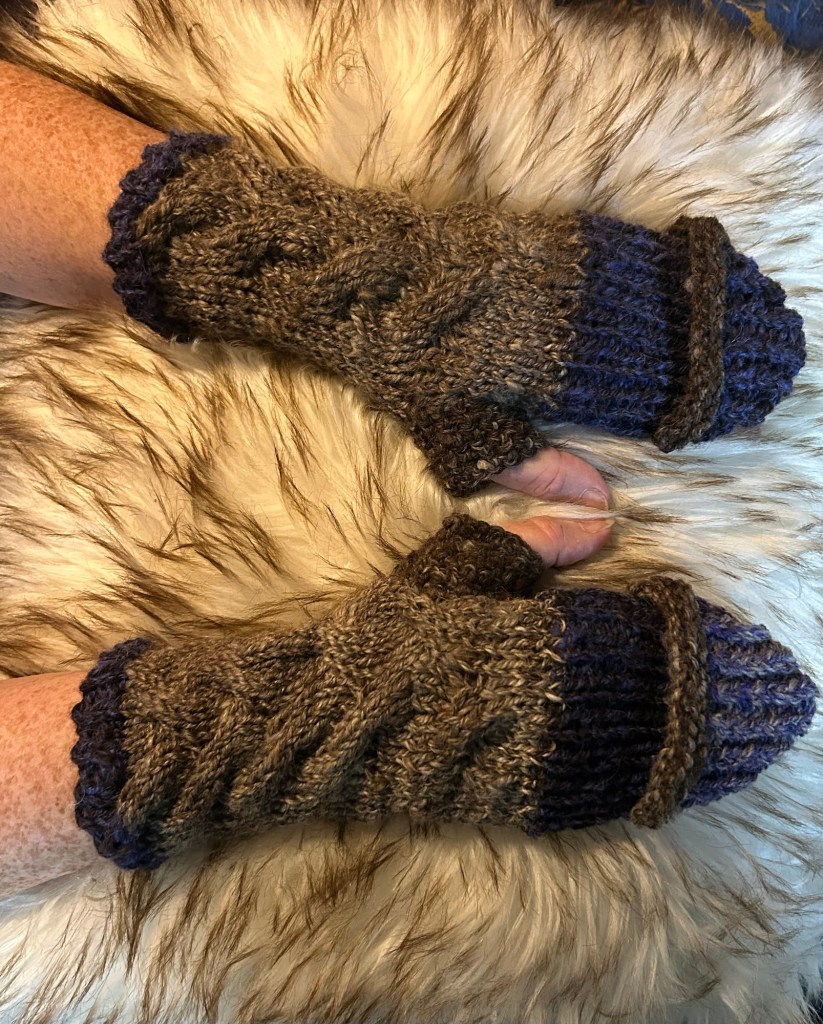
You will begin following the same instructions as above except this time we will be placing the thumb hole on the opposite side of the cables. If we put the thumb hole on the same side then the cables will be palm side down instead of wrist side up! (See photo)
Following the same directions for the left glove for the first 5” you will then place a stitch marker between stitches 15 & 16 and begin your thumb hole to the left of the cables (when you stop working in the round for 8 rows). Joining back in the round on row 9. You won’t need the stitch marker while knitting flat with the split between stitch 15-16. But you can place one the row before to know where the start.
Again to keep the cable pattern going correctly I stopped and wrote down where I was in the pattern at 5” so I don’t get mixed up (this may vary).
K15 to get to stitch marker. Stitch 15 is now the beginning of the row (don’t remove the original stitch marker). Turn (work flat not in the round).
Row 1 slip, purl to the end
Row2slip, k24, k3 on spare needle and hold to the back. K3.pick up 3 stitches on spare needle and knit.
Row 3 slip, purl to end
Row 4 slip, knit to the end
Row 5 slip, purl to end
Row 6 slip, k18. K3 on spare needle and hold to the front. K3. Pick up 3 stitches from spare needle and knit. K6
Row 7 slip, purl to the end
Row 8 slip, knit to end joining back to knit in the round
Row 9 knit (in the round)
Starting row 9 you will discontinue the cable pattern and work straight knit stitches from here forward unless otherwise indicated. Continue pattern the same as for left glove from here.
I did notice I made a few mistakes on the right glove. I should have placed the second stitch marker for the thumb hole between stitches 18 & 19 (instead of 15 &16) to allow 3 stitches between the cable and the thumb hole edge. Also… somehow… I ended up with one extra stitch somewhere along the line while making the thumb hole and didn’t catch it until much later 3 rows into the blue yarn lol)… I just did a k2tog at the end of the row to correct that. So the counts for rows 1-9 might be off by one stitch when you make the glove.
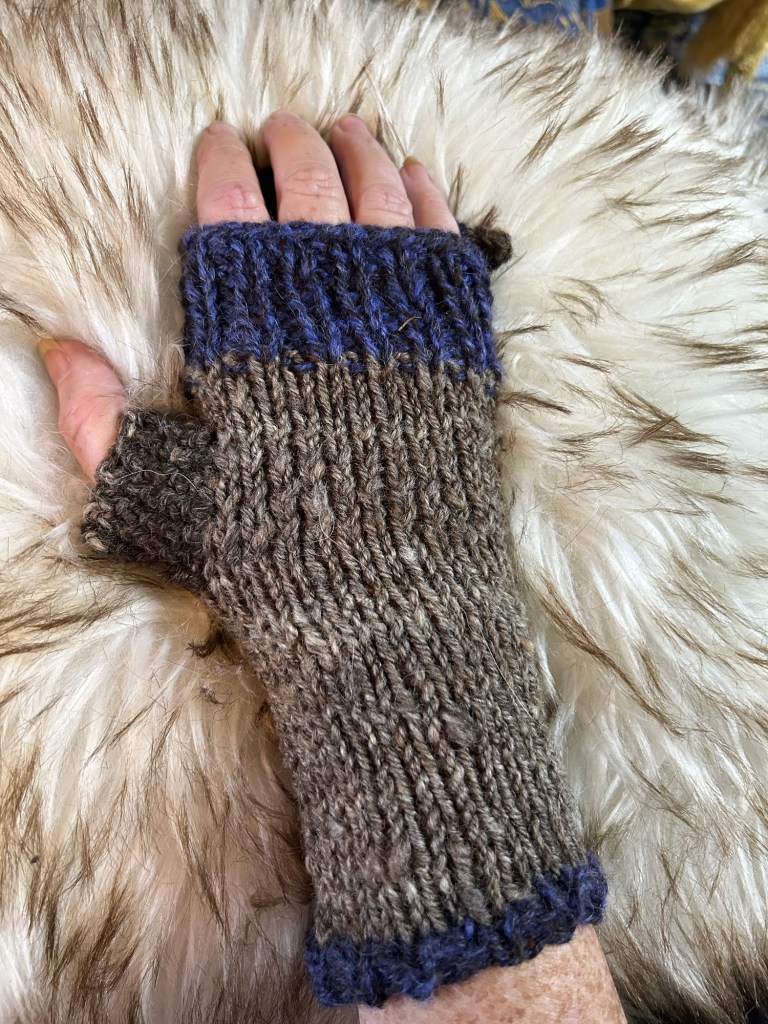
My final product! notice I ran out of the dark blue yarn and had to use some scrap lighter blue yarn to finish up the second glove… but that just adds to the hand spun, hand knitted charm! Besides… I doubt the dogs or chickens will complain about my mittens not matching exactly! 😉