We came up with this helpful little RV hack last year, but I wanted to wait to post about it until we had some long term testing data. The problem: we kept having wasps going into the compartment on the outside of the RV behind the refrigerator and building nests. This is not fun because it causes wasps to hang out flying in and out underneath your nice patio area, nor is it fun because you have wasps building nests inside your “walls” … but it’s actually dangerous because most RV refrigerators operate on electricity as well as propane! This means there is a pilot light inside that little wall compartment behind your refrigerator. This further means that if the wasps build their nests in a spot near the pilot light… one of two things might happen. 1. Your fridge won’t work while on propane setting and 2. That paper wasp nest might catch on fire when your fridge starts up on propane setting. I’m no mechanic, and I might be paranoid, but I really don’t want my full time living quarters catching on fire due to poor maintenance and wasps. If nothing else it makes sitting on the patio sting free 🙂 and I don’t like cleaning wasp nests out of small enclosures to say the least!

So as you can see in the photo we take the main compartment door off regularly to clear wasps nests and perform regular maintenance, but these large vent holes on the side are awkward to try and keep wasps out. These holes are large enough for me to poke a whole finger thru each hole, so they are rather large. NOTE: You don’t want to completely close off the air circulation to these vents because that’s a whole separate set of dangers.
Hubby has tried various types of methods from window screen to dog flea and tick collars trying to deter the wasps from this compartment… but it’s the wife who finally came up with the winner! Lol yay me! Lol behind every great man… right?
As you can see in the photo the walls of the vent areas are sloped. Similar to if you were to cut a cup on a diagonal from top to bottom. So this makes it even more of a challenge to try and still allow air flow but keep wasps out. Nothing sees to fit in there and want to stay in place, and it’s a hard place to try and put anything on the inside of the compartment because it’s so tightly enclosed inside.
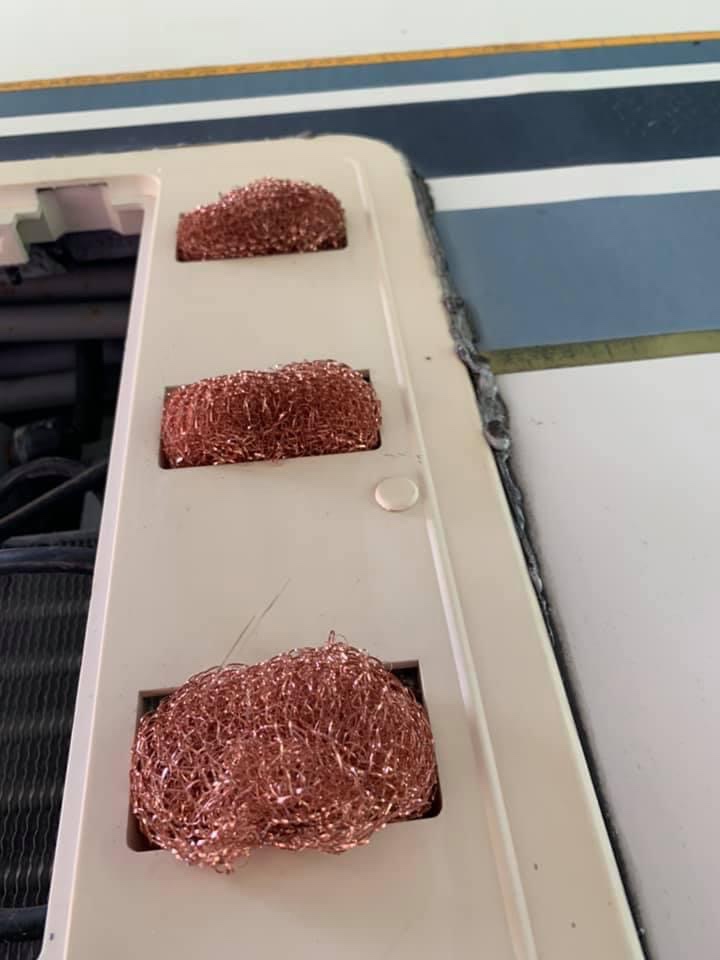
My solution? Copper kitchen scrubbies! I put a bit of thought into deciding on the copper ones beside the fact that it’s a pretty color lol. Originally I thought: plastic shower poofs.. which lead to plastic kitchen scrubbies, as these would be able to mold to that weird cup like hole while still allowing for ventilation. But then I thought… that’s the hot side (full sun) of the RV usually and sun breaks down plastics so very very fast… plus if we need to switch the fridge from electric to propane ( which can also radiate some heat) then we get a melted blob of plastic up in there that is going to be a mess to clean out! Nope that won’t work! So then I switched to the idea of metal kitchen scrubbies, thinking of the traditional grey ones. But if you have ever had those in your kitchen you know they rust like crazy! Then I remembered seeing copper ones in the dollar tree! Hmmmmm Copper doesn’t rust, it would provide ventilation, and would still be moldable because it is a soft metal! Winner winner ding ding ding! So began our $3 fix of using copper kitchen scrubbies! Which did indeed keep the wasps out! It worked great!
We put these scrubbies in the holes last spring so it has been a year now and they have been in there all summer and all winter and now it’s time to share the test results on how they held up long term! Did you know copper scrubbies sorta become powdery over time? Gonna have to remove them gently for sure! Not sure what that’s all about but… it is what it is!
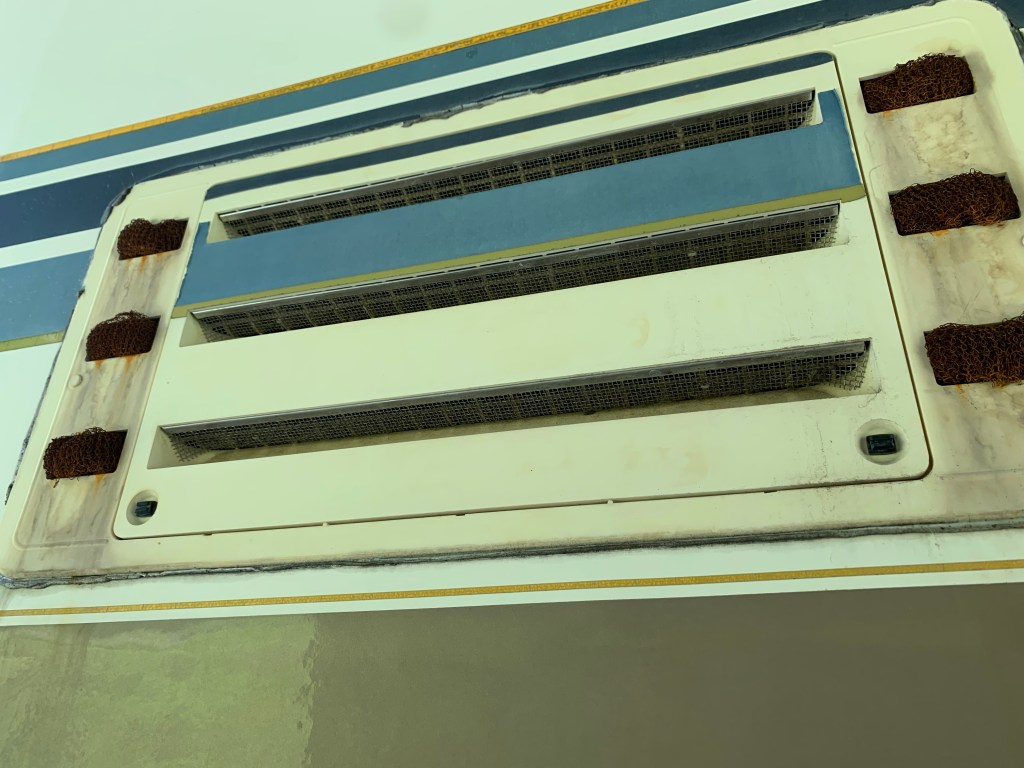
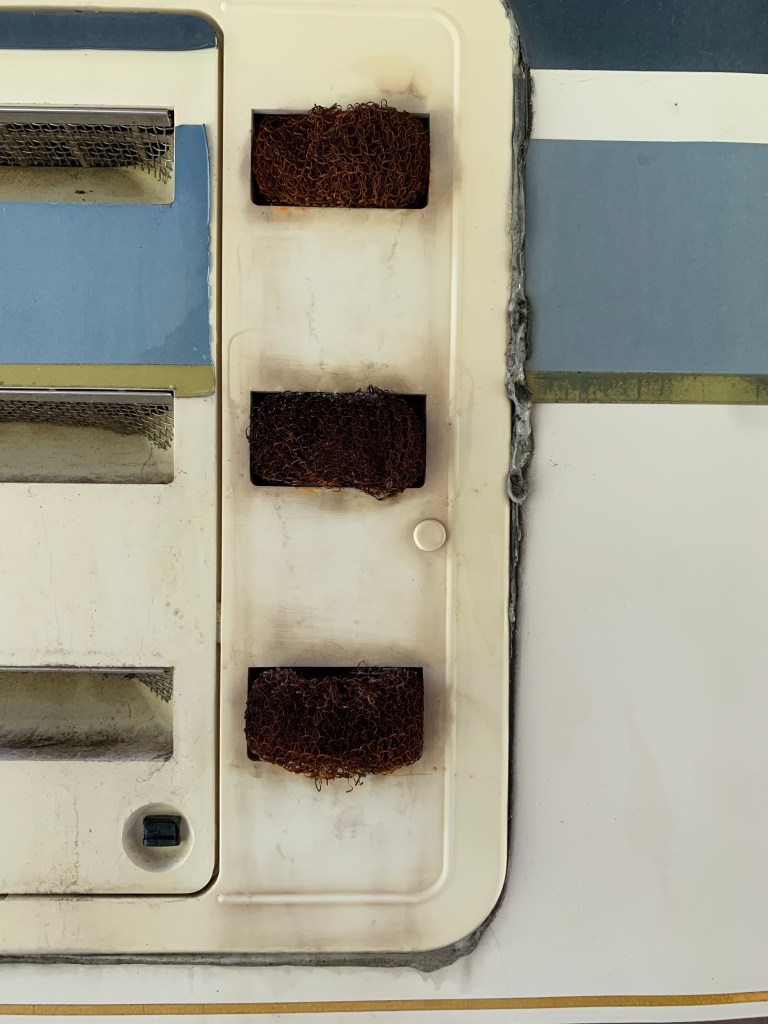
The long vents in the center we were able to use tradition wire mesh you purchase at any RV center for exactly this purpose. You cut it to size and pop them it. But you can see the weird vents on the side with the large holes and cup like indents where we placed the copper kitchen scrubbies last year.
If you zoom in super close you can see the kitchen scrubbies did rust a tiny bit over the last year. So I’m think of replacing them with a stainless steel version? But these did so well… I’ll probably just stick with the tried and true and replace them on a more regular basis than every 12 months lol. They did cause a small amount of discoloration on the plastic vent cover in our 12 month test….as you can also see in the photo. Now comes the next test (and why we wanted to wait before posting bout our hack) does that stain come off when it’s bath time for the RV?
We tried three different methods of cleaning some test patches to see which one works the best. We used a green pot scrubber, with first up being plain old dish soap and water. We like to use things for cleaning that we commonly keep around the house. Nothing worse than buying an expensive cleaner than finding out it doesn’t work! Well… dish soap and water was a fail… so on to my next go to remedy. Shout fabric/laundry cleaner. I’ve used this stuff for years to get the kid food stains and red clay stains out of car upholstery and carpets, amongst other things. It’s a really handy product to have in a pinch! Its one of my go to cleaners for just about everything! It does a wonderful job on cleaning stainless steel sinks BTW! Sooooo shiny afterwards!
It did not disappoint! We tried it on the bottom underneath the bottom most scrubby in the photo that the dish soap and water failed to make any noticeable changes on. We started our test patches at the bottom and worked up so we didn’t get dripping mixes of products making the test patches unreliable test results. Then I thought… let’s do shout again on the next test patch up to make sure it’s the shout alone and NOT the pre cleaning with the soap and water! Duh! Science 101 right? We got the same results. The third patch up (being underneath the top scrubby) we used Windex. It did almost as good as the shout. But to me the shout test area is the winner. I may just have hubby take this whole panel door off and soak it in a bucket of shout water while he does maintenance on that compartment. Then he can put new sealant on and make it look all pretty and new again 🙂
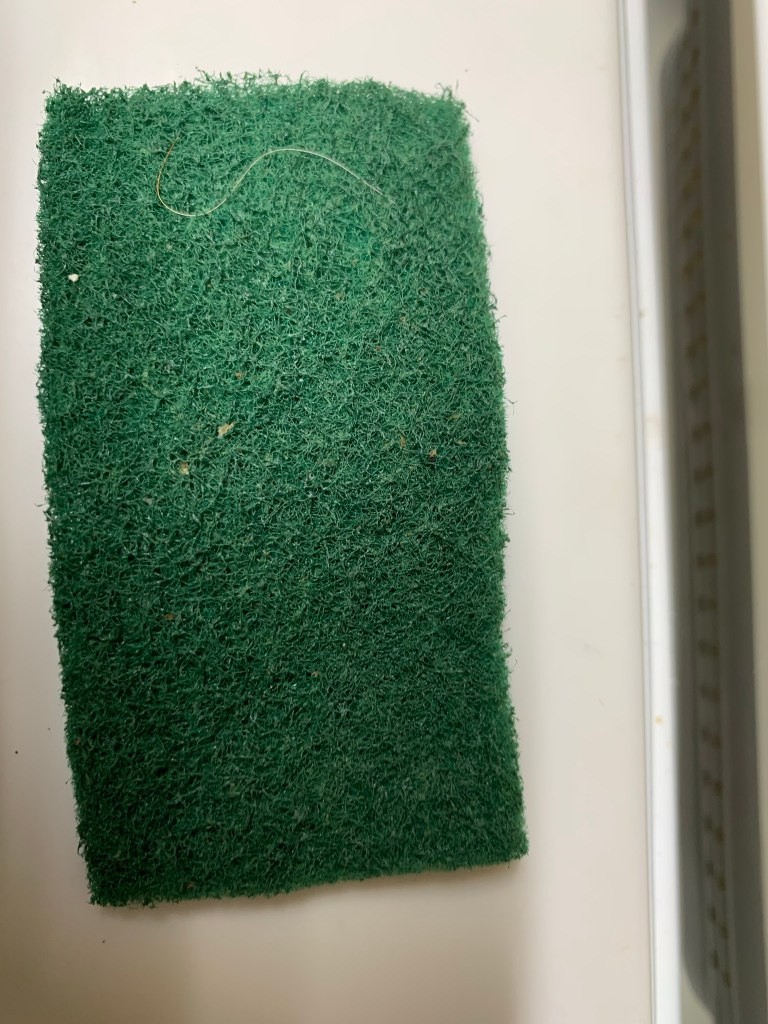
It still looks a little gross in the photo lol but remember I’m only at the stage to do test patches right now to see what works best to clean those stains. Next stop is the local dollar tree store to purchase new kitchen scrubbies for this year. I think replacing them every couple of months is going to be the way to go in future. Maybe even removing them altogether in the winter? Once I have those in hand I will clean the whole door panel with my shout and green scrubby. Then I am set for another year!
If you want to see the final photo of how it all turned out I will be posting those photos on our Facebook page so you can check those out later on (give me some time to finish this project for those photos to arrive lol). But at least you now know our year long test of battling those wasps and how we finally found an inexpensive and easy solution!
