
When I was a child the ladies at the church always made what they called stained glass candy especially around Christmas time. Basically a hard candy with flavor of your choice. Very easy to make! The ingredients are simple and you probably already have most of it in the kitchen unless you want to get fancy lol!
All it takes is a 1 to 1 ratio of sugar and water boiled together on the stove till it reaches hard crack stage. There are tons of recipes out there already that describe how to do this so I’m not going to go into the details of that, but more of the details of why to make it, how to make it pretty, and the history behind it!
So let’s start with the history! Stained glass candy got its name because … yep you guessed it … it resembles stained glass in a church! I guess that’s why the church ladies always made it around the holidays. My favorite was always cinnamon flavor with red food coloring lol. They would pour the liquid candy onto a foil lined cookie sheet and once it hardened us kids got to hit it with a hammer to crack the candy into pieces (what fun!!!), then place it in a paper bag with powdered sugar and shake to give it a powdery coating so the candy pieces didn’t stick together. I must note that now that I’m older and more health conscious I avoid food coloring and try to stick with natural flavorings rather than the store bought little bottles of yummy goodness I loved as a child lol… but to each their own.
Rock candy is another name. Sometimes it has no flavoring or coloring and sometimes it does. But now we are starting to get into the “why to make it” part… what are some uses other than just holiday (easy) candy?
How about cough drops? Using lemon juice for vitamin C we can turn that rock candy into some very nice and inexpensive “lemon drop” type cough drops. Play with the flavors and ingredients to make it how you like it. Another use? How about a slow dissolving sugar cube for that cup of tea that you keep refilling for that winter cold? Soothing for the throat, yummy for the palette, and depending on which herbal tea you are using maybe even helpful in resolving, defeating, or preventing cough and cold season! Maybe you like a bit of lemon in your tea and the “lemon drops” would be perfect. If you don’t like lemon… make plain sugar drops or “sugar cubes” 🙂
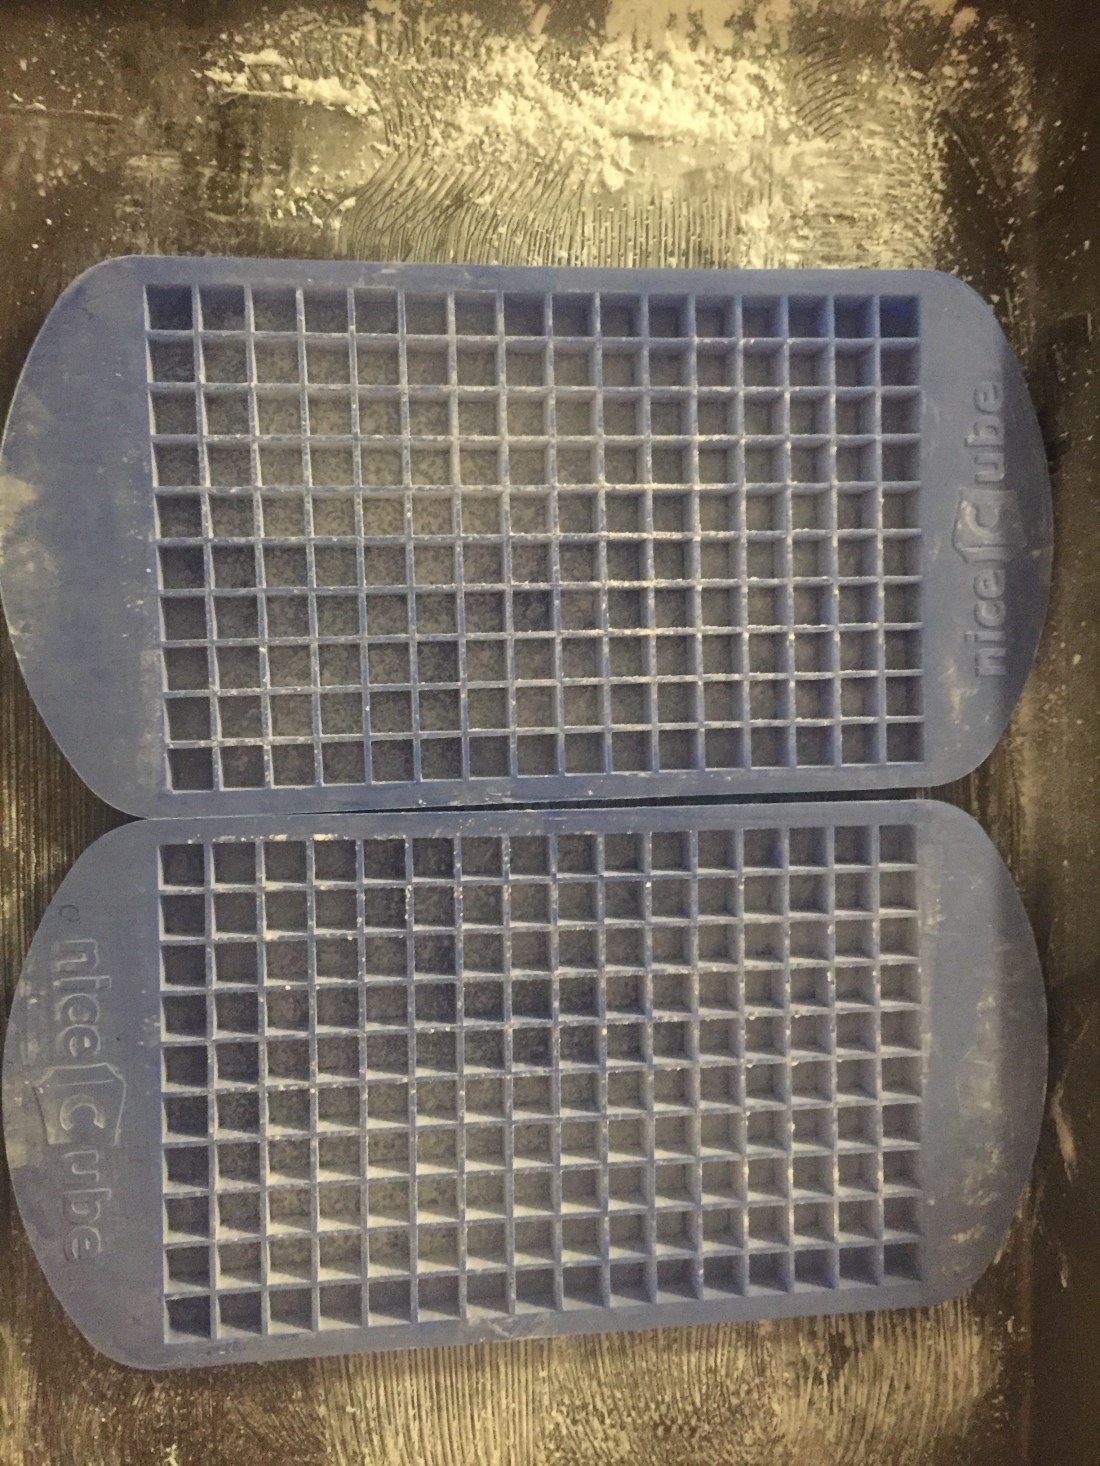
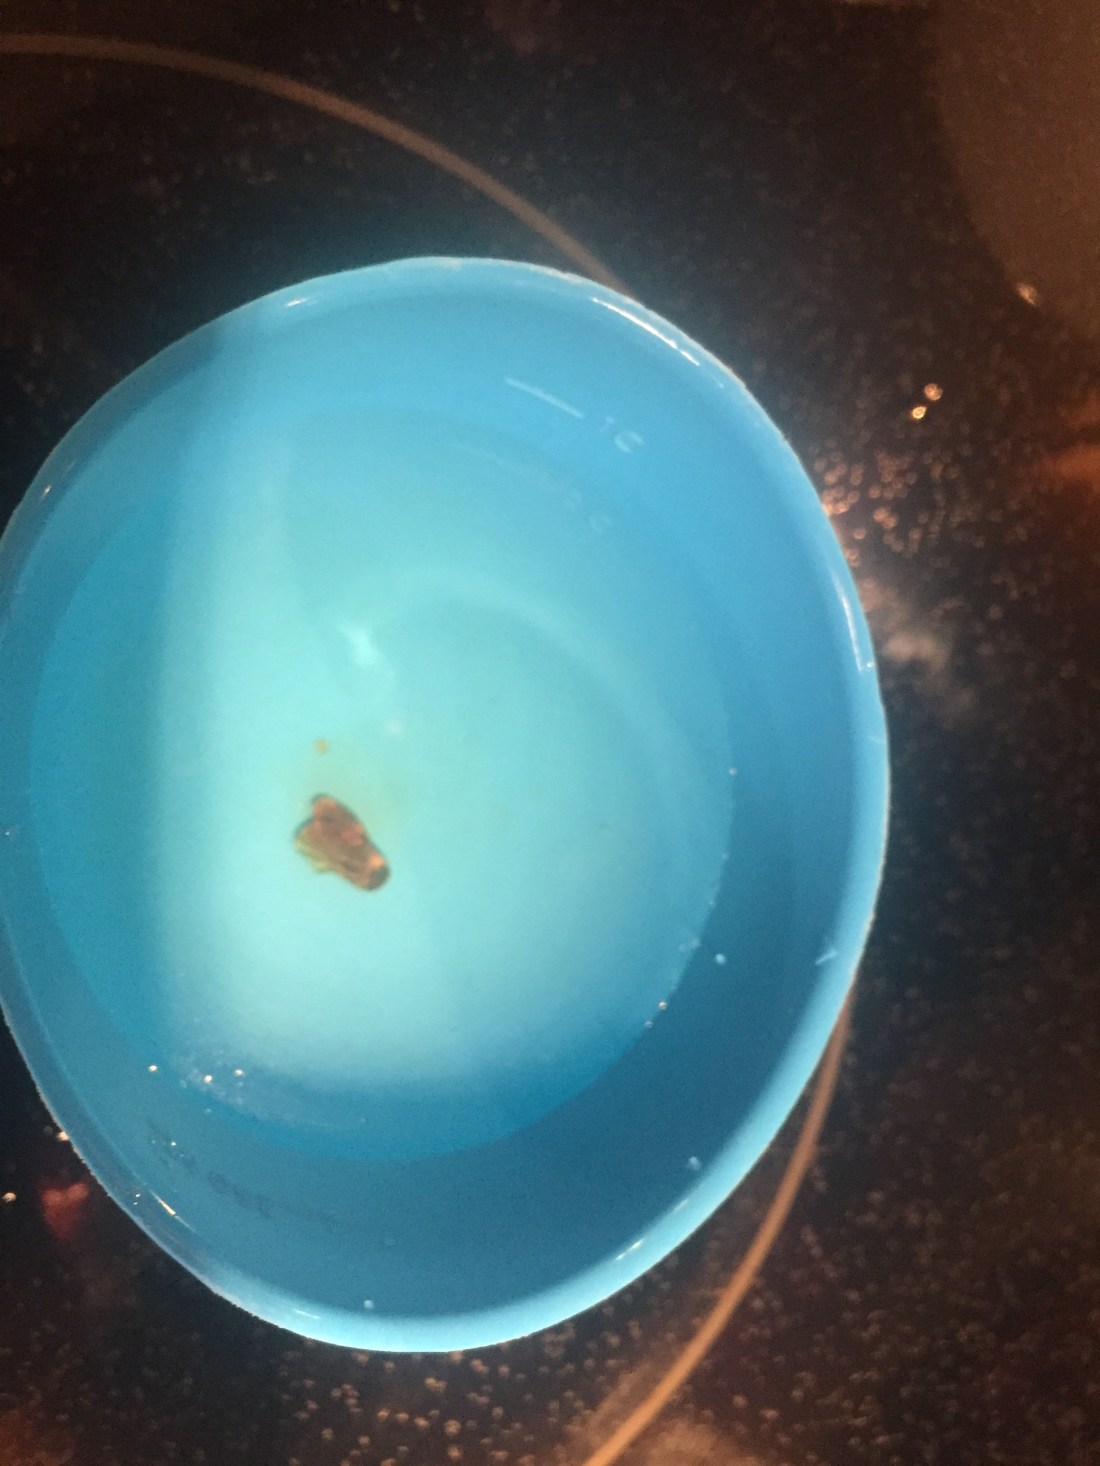
Now for what all those easy to find recipes online won’t tell you… how to make it pretty! Well you could always go with the “stained glass method” but I’m going with tiny cubes. I purchased silicone ice cube trays that are also heat resistant and can be used for baking, that have tiny cubes. By coating the ice cube trays with a fine powdery coating of corn starch to prevent sticking and to make it easier to remove my sugar cubes I can easily pour the hard crack stage candy into the candy molds to cool and then just pop them out and they are ready to go! This also meets my purchasing rule of “has to have dual purpose” before I buy anything new… small ice cubes in summer will be a treat! I can also freeze small cubes of oil or butter with herbs mixture for cooking and other things using these little cubes.

For my recipe today I am using: 1 cup white sugar, 1/3 cup lemon juice (because that’s all I had left in the fridge lol), and 2/3 cup water (to make a 1:1 ratio). I’m also using my wonderful vintage corningware with a pour spout to make it easier to pour into my molds (and corningware is super easy for clean up afterwards). A candy thermometer is handy too!
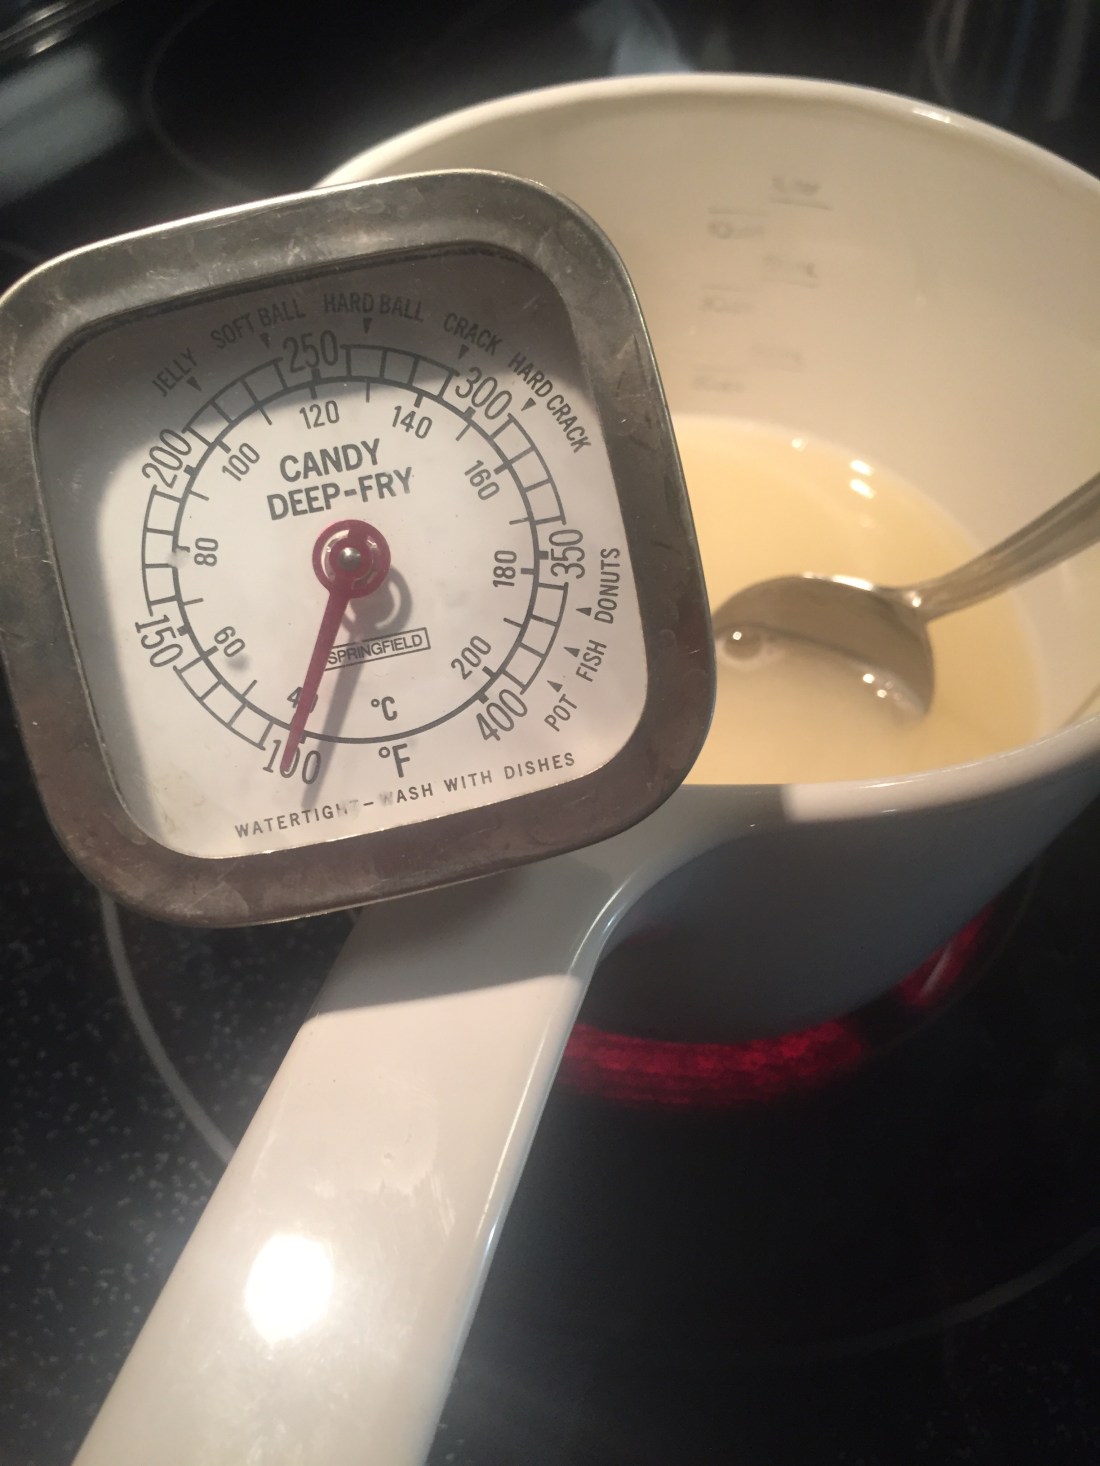
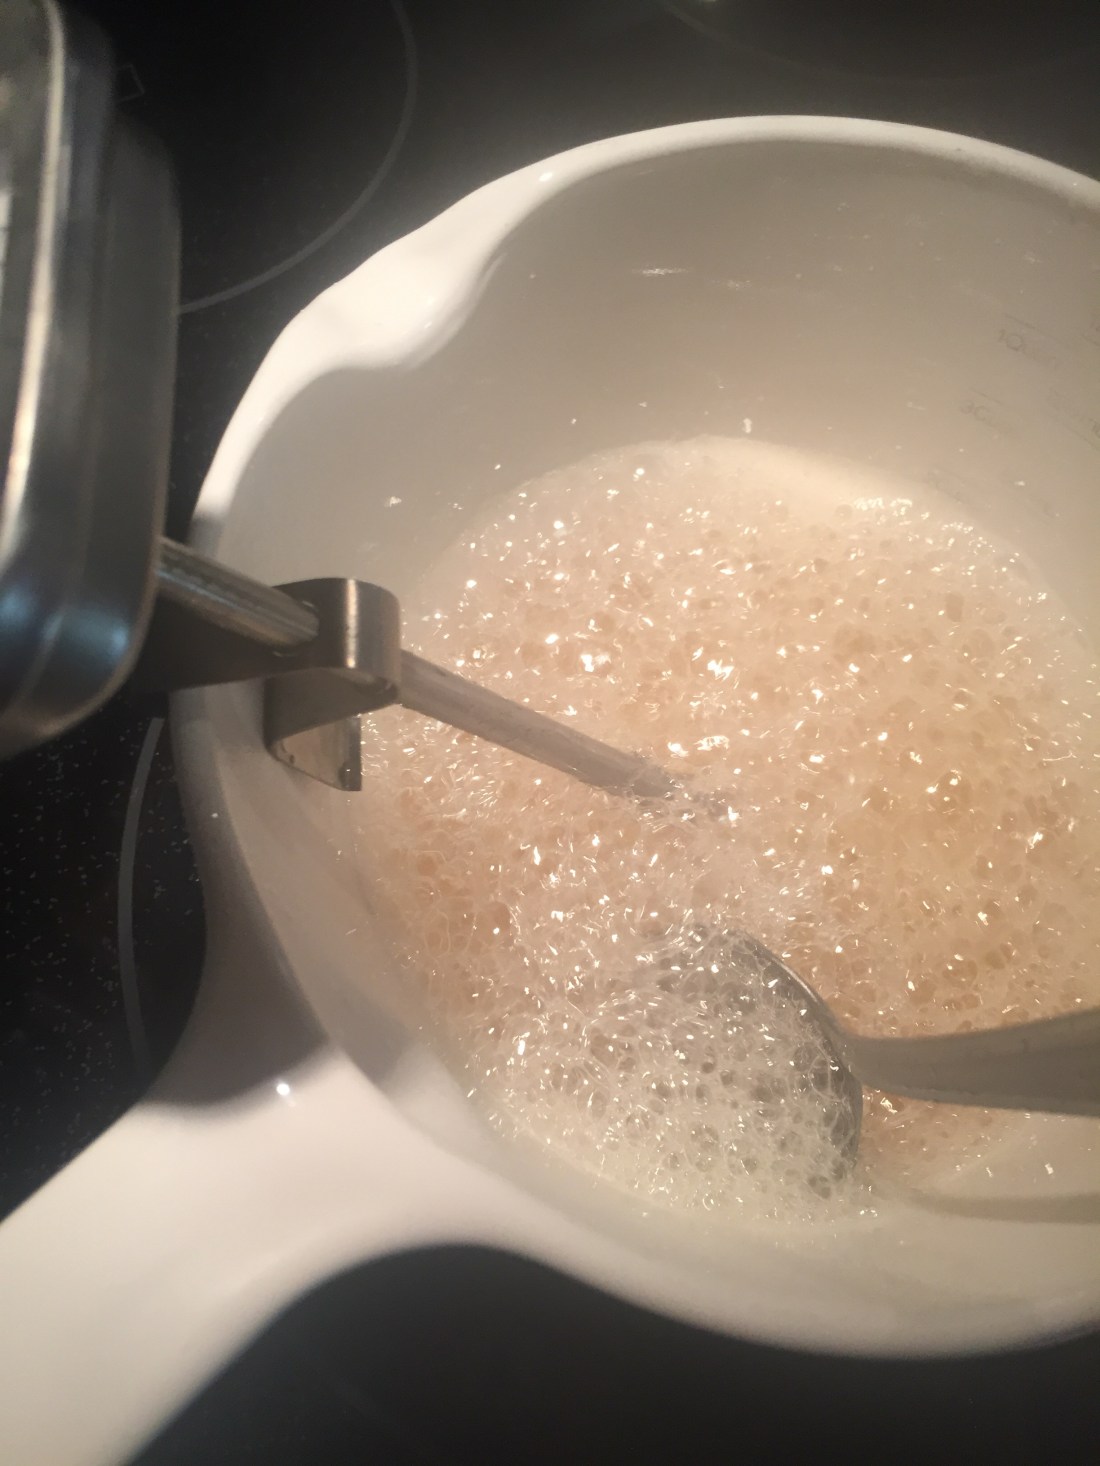
I love how the bubbles start to turn glassy looking as the liquid is boiling out! Basically we are reducing that initial 2 cups (sugar plus water) back down to 1 cup while keeping it in molten liquid stage to make candy! Even tho I’m using a candy thermometer to tell me when I have reached hard crack stage (continuously stir people!) I use the old tried and true church lady method to test if it’s ready to be candy by dropping a tiny drip into some cool tap water and then testing to see if it’s hard or still a bit gooey (it should be hard like hard candy, not gooey and by testing… I mean eating lol)
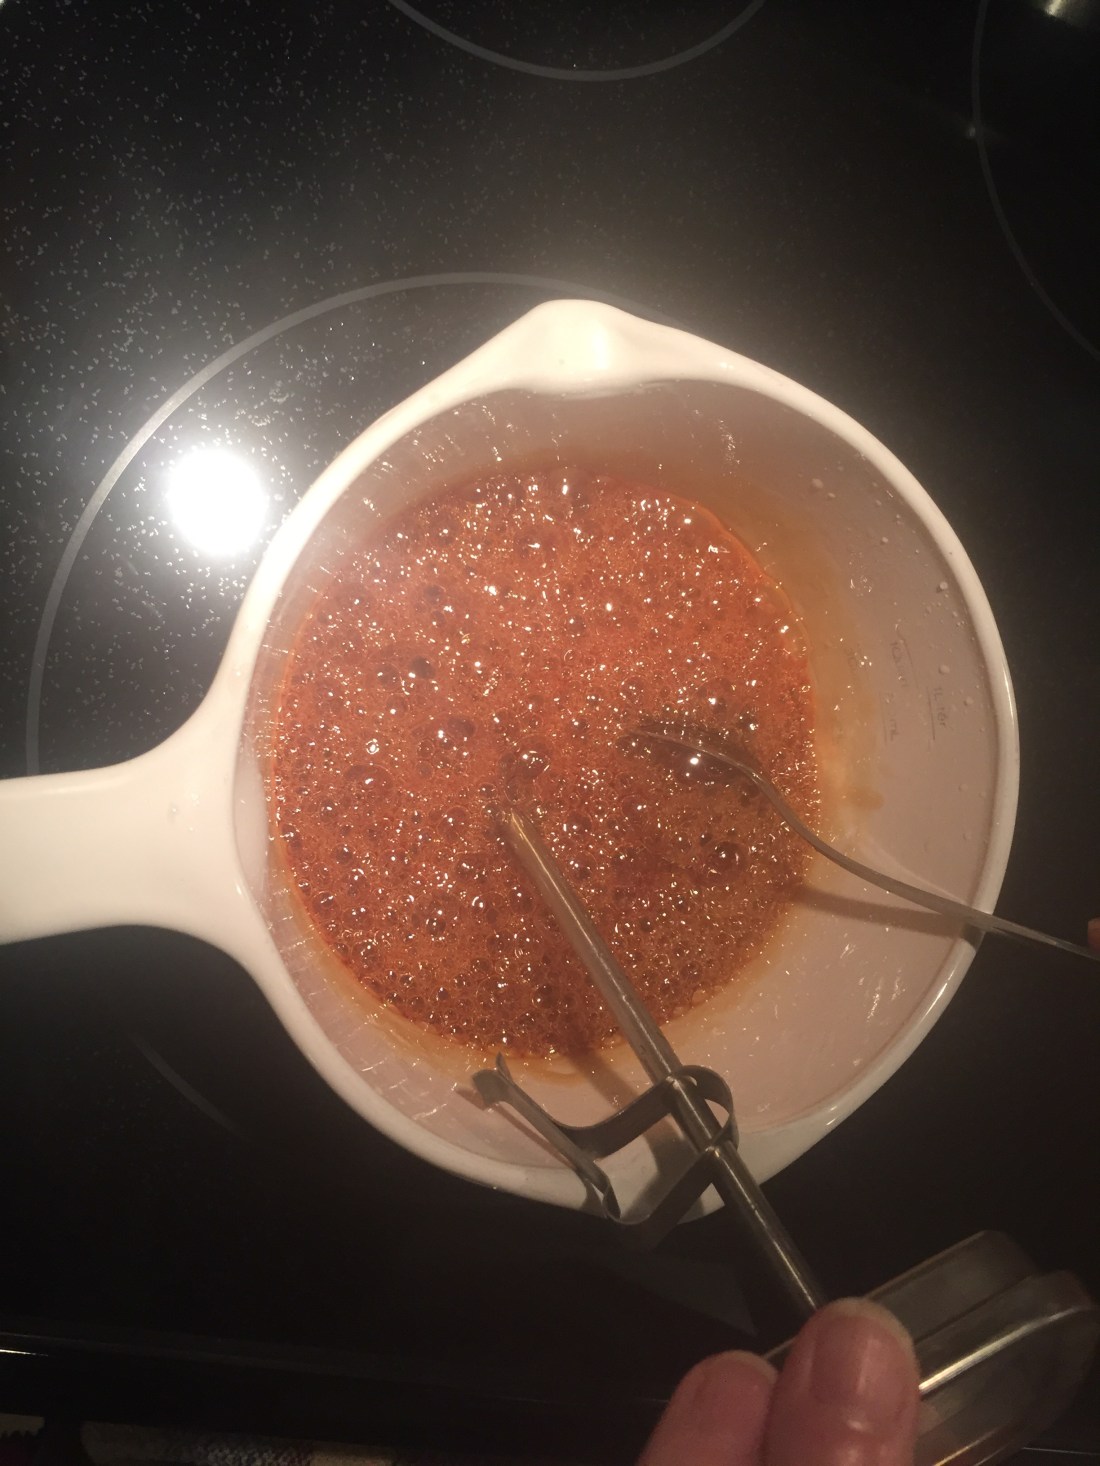
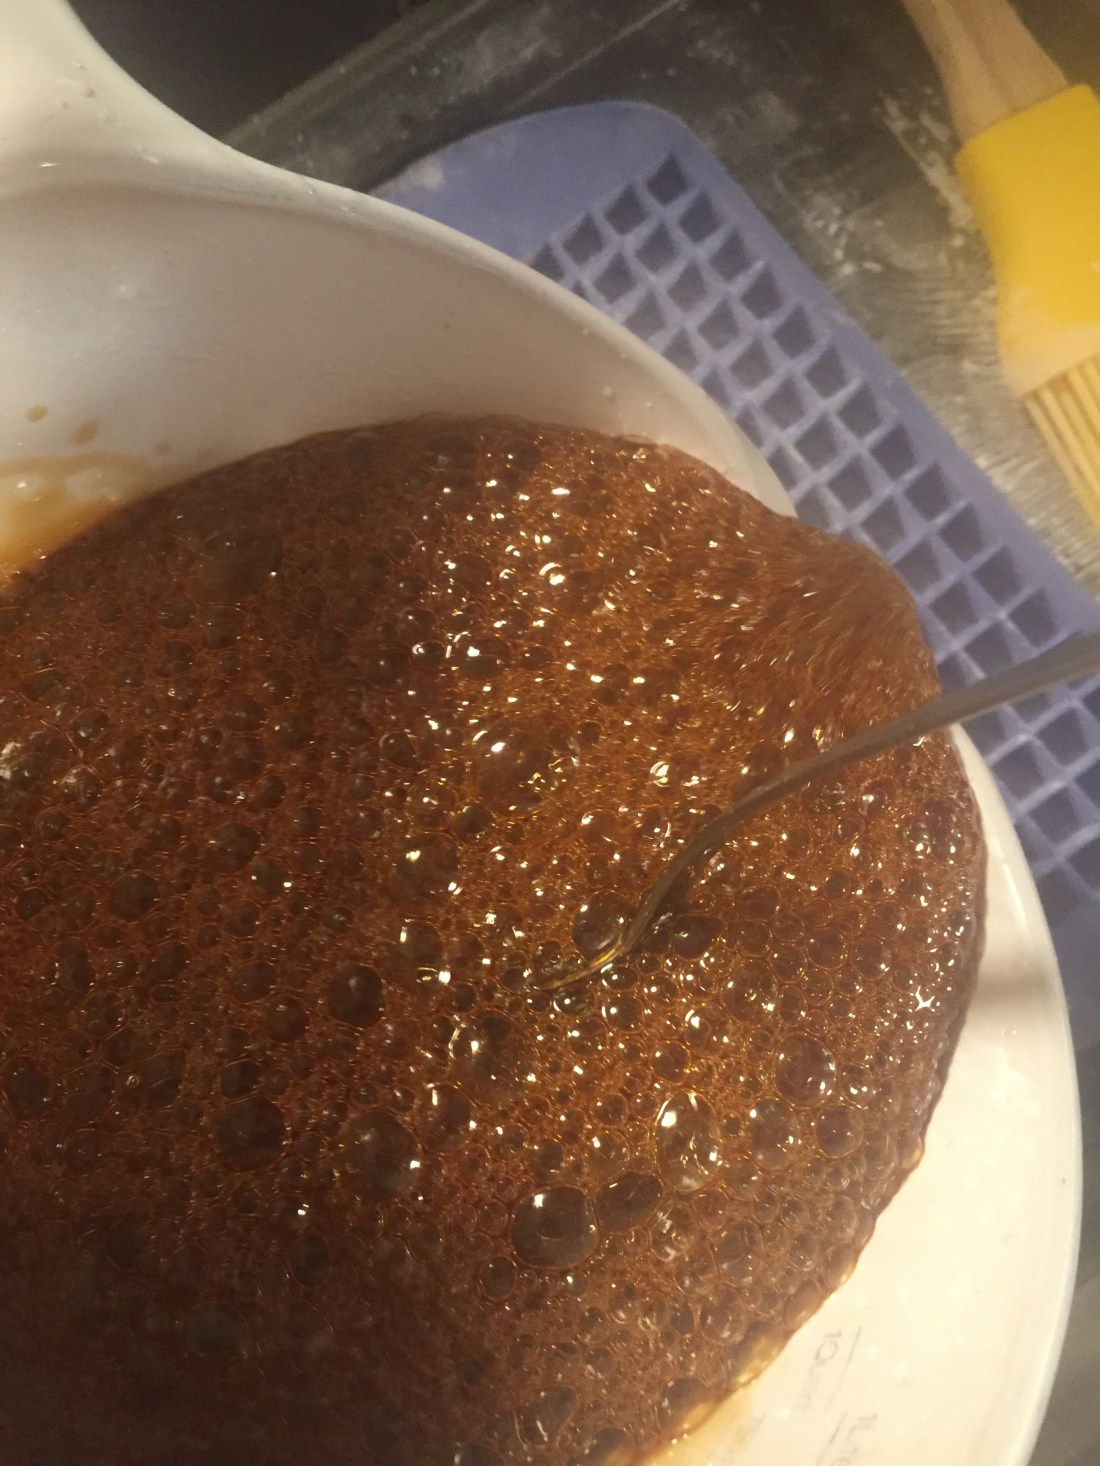
You know it’s almost there when it starts to turn a nice golden brown! Basically you are making a very hard caramelized type candy! So if brown candy ain’t your thing… this is where you start adding some food coloring to get whatever color you want. But I like that amber brown color as it feels “old fashioned” and comforting in a way 🙂
Next quickly pour your liquid gold … Umh I mean candy lol… into the candy mold of choice (use a butter knife to get bubbles out by smoothing over the top of the mold)… and wait till it cools! The cooling part doesn’t take long, honest! While you are waiting go make a pot of earl grey tea and try a lemon drop in the tea cup 🙂 you won’t be sorry!
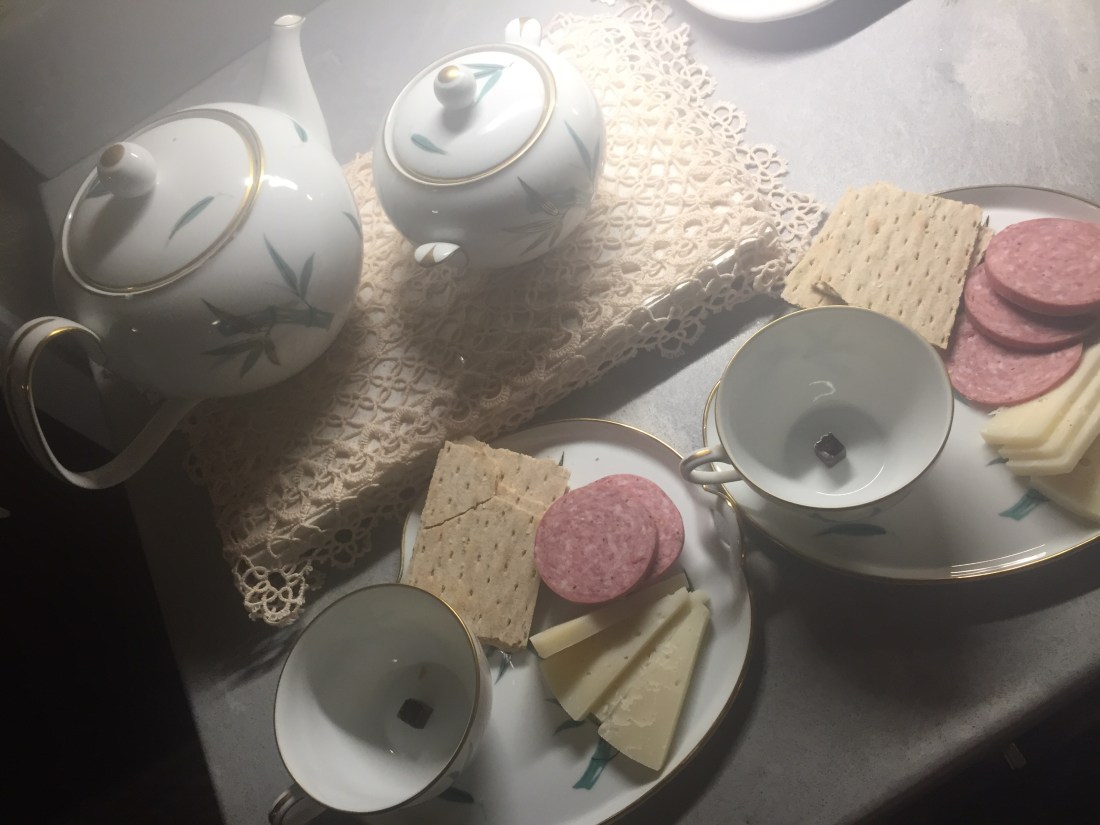
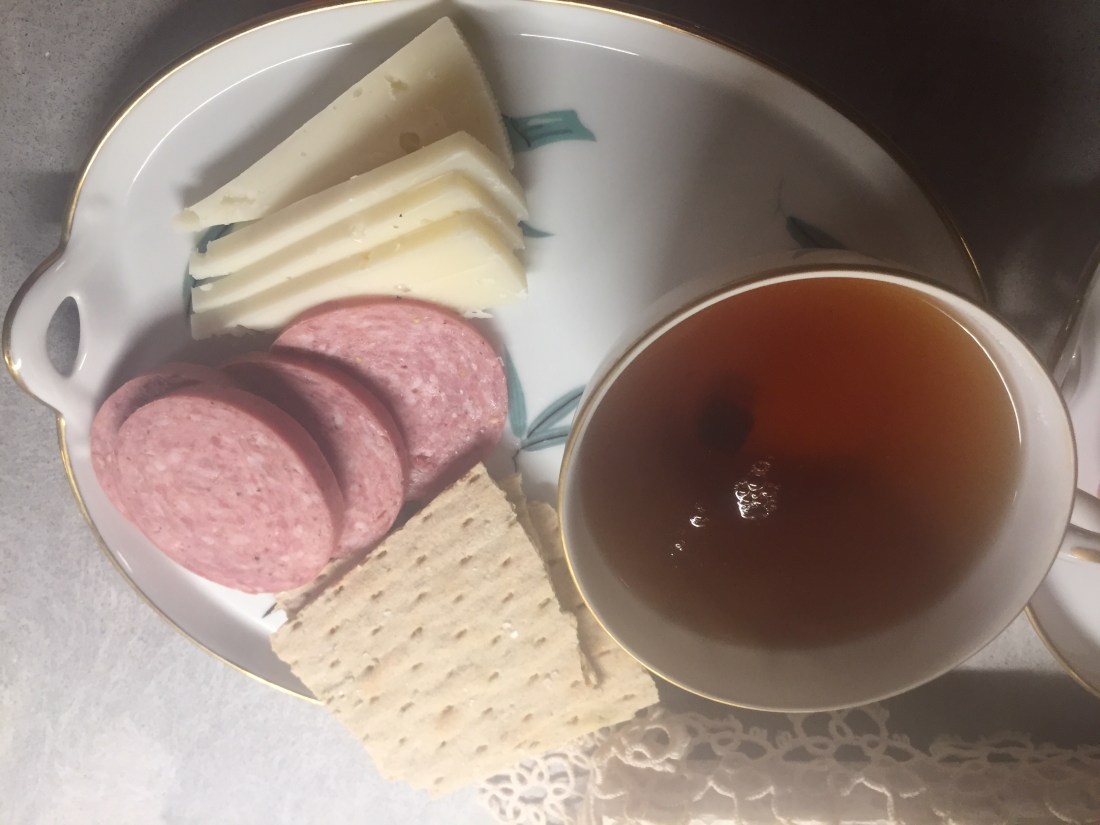
Hmmm maybe a little goat cheese, summer sausage and rosemary crackers as a snack too? Lol
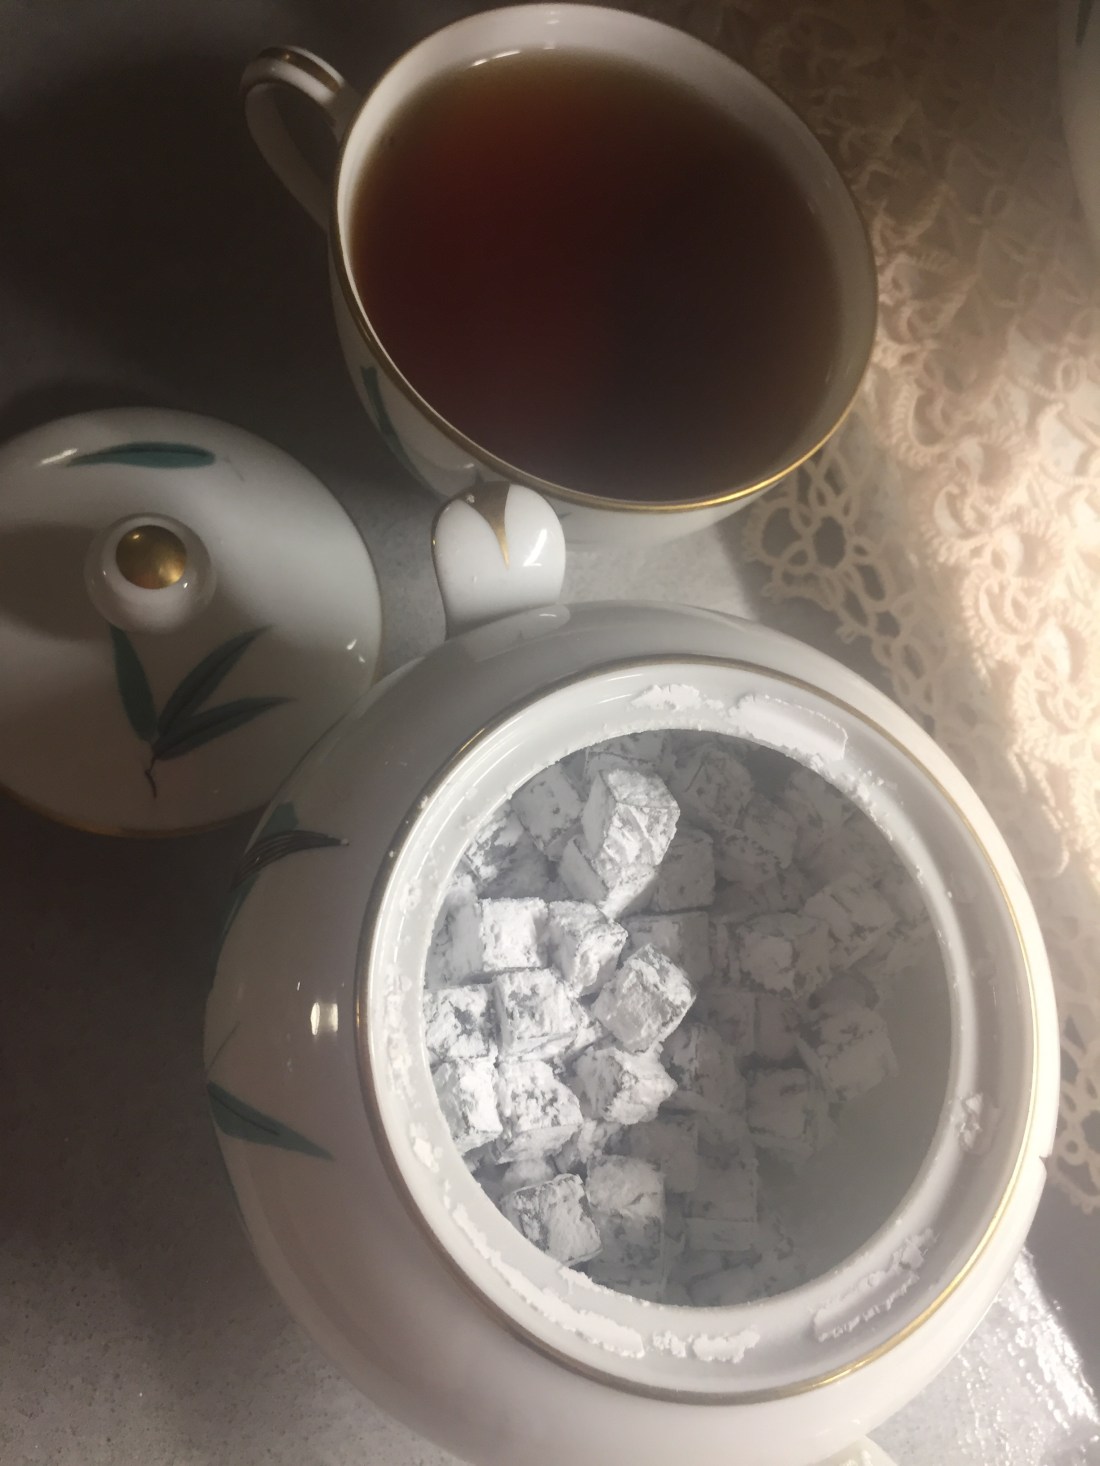
I’m going to store these in my sugar bowl that matches my tea set to use for tea and the occasional cough drop. So I popped them into a paper bag with a bit of powder sugar to coat them (to keep them from sticking together in the sugar bowl) and voila I am done! Ooops got a bit too much powdered sugar in the bag lol … wait is there such a thing as too much powdered sugar on candy? Nope! I thought not! Lol
As a side note I’ve tried the method of pouring out the candy on a cookies sheet and then scoring it before it cools so it will crack into cubes… but I could never get that method to work for me! Also there are tons of heat resistant molds you can choose from! Different shapes like hearts and flowers and teddy bears all the way to lolly pops (you can even buy lolly pop sticks). Not to mention all the different flavorings that are available! So get creative and make them how you want them to taste as well as look! That’s the beauty of this recipe. Inexpensive, fun to make, and many uses, shapes, forms, flavors, and colors!
