So today I’m making some (hopefully) beautiful wet felted hats. I started with a little research and found some great instructions here: Felt hat instructions
After yesterday’s fiber festival I have tons of wool to play with and lots of inspiration! So I went to the local goodwill and dollar store and party store to pick up a few additional supplies.

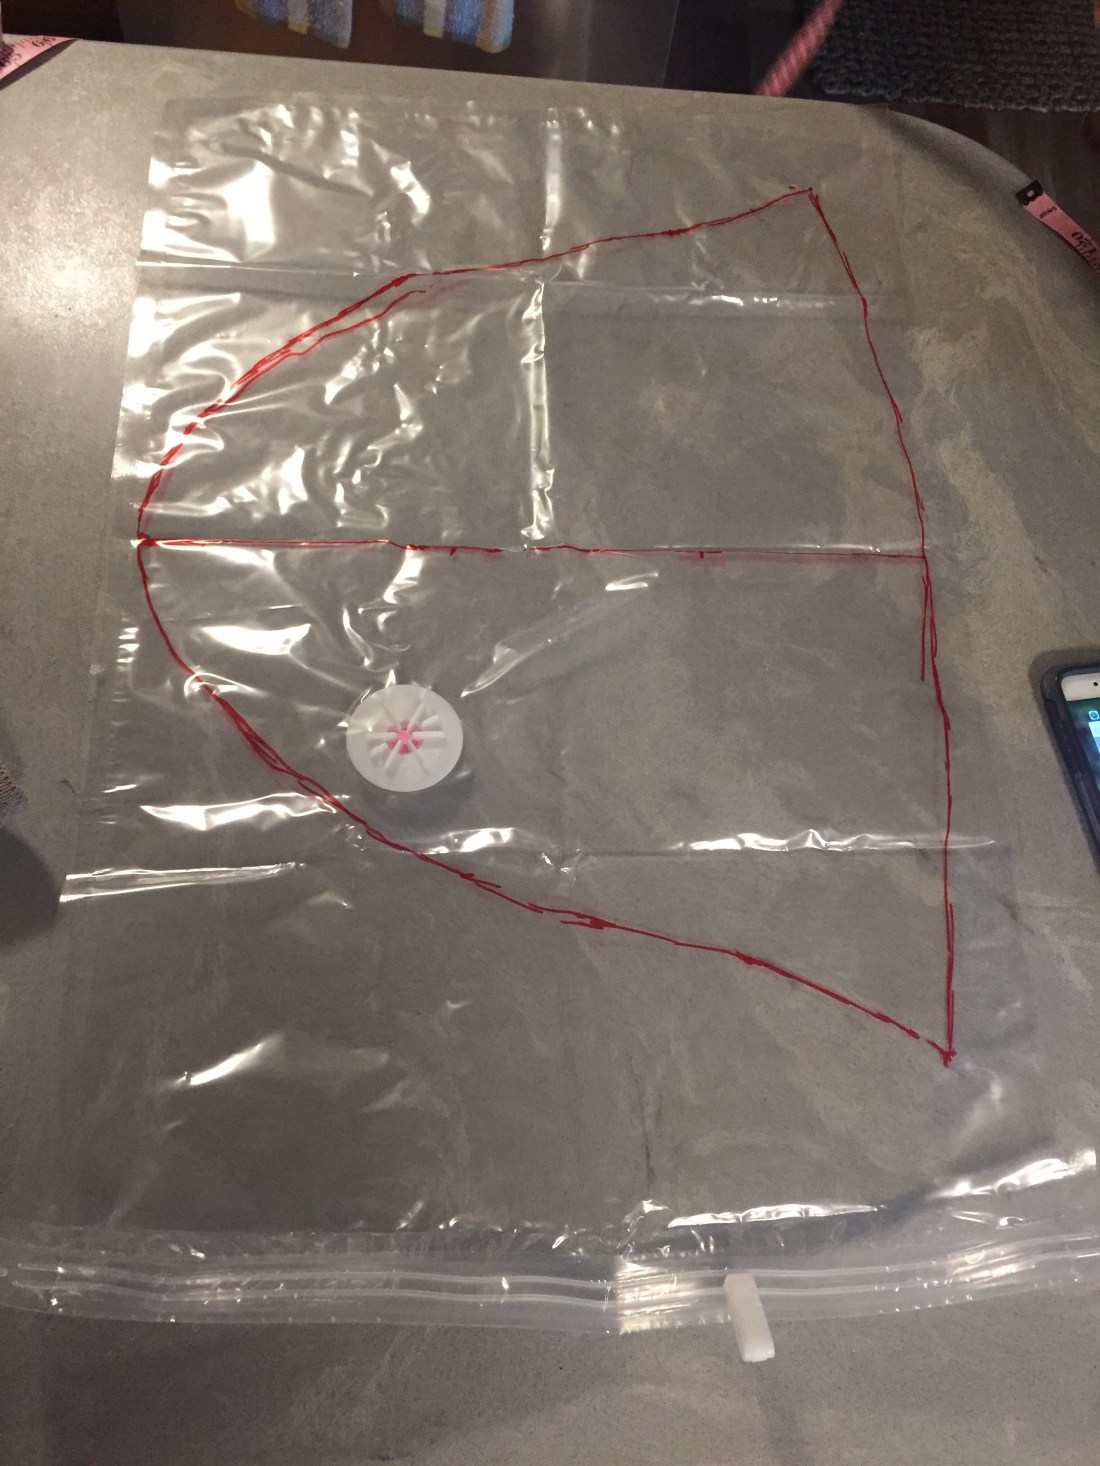
We are using the dollar store vacuum seal bags to draw and then cut out the inner template for our initial felting since this is a thick plastic, was only a dollar lol, and was perfect size to make our template! We will dispose of the side with the white plastic hose attachment part. We only need one side of the bag anyway.
Now to get started felting (I sure hope this is as easy as the instructions look because I’ve never done wet felting before!)

Ok so this was a test hat so here is what I figured out for the next one.
1. Use dish soap in the squirt bottle. You need the Sudsy action to make it felt.
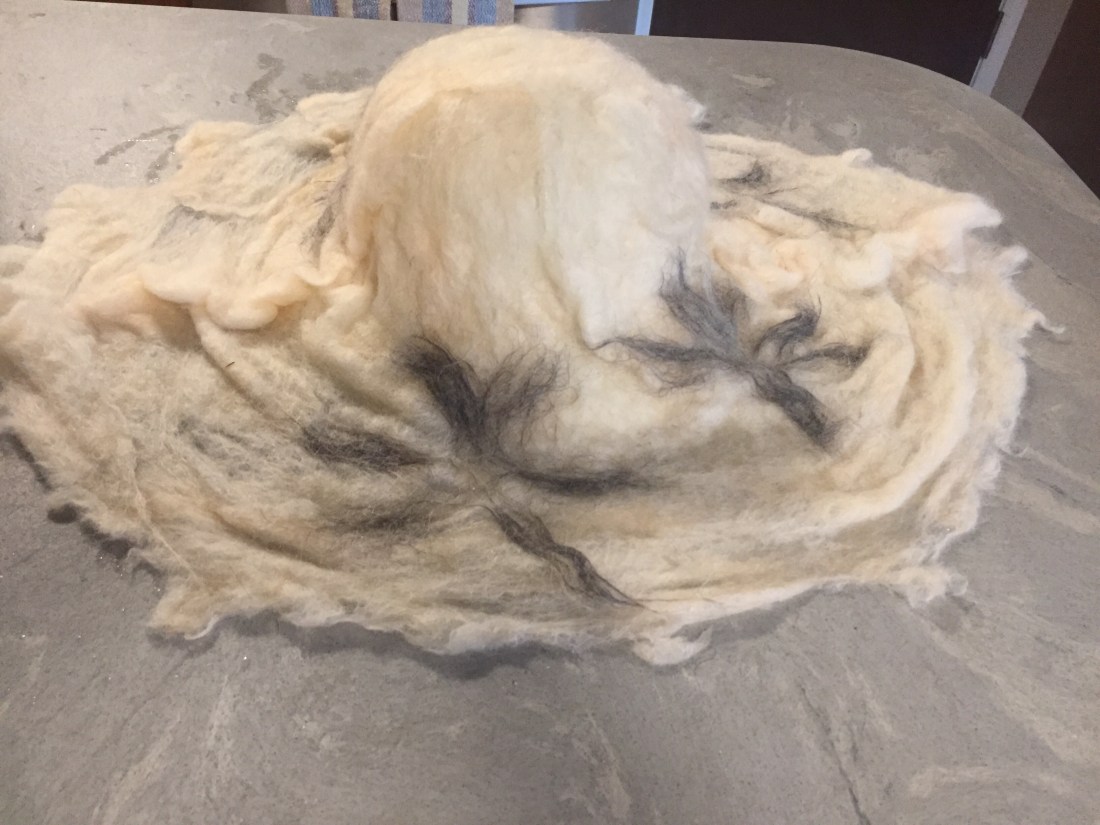
2. Use merino wool. Alpaca (the grey) was very hard to get to felt and I’m not sure it’s actually felted. We shall see when it dries and I trim it up. (After note: it sorta kinda felted… but the needle felting helped finish it off nicely)
3. I only did one layer of wool because this was a test to perfect my technique. Totally need at least 2 layers to not have any holes/thin spots and to get it to felt better on the next hat.
4. Once I trim it … depending on shrinkage after it dries… I’m thinking I can use the trimmed off pieces to make flowers and other fancy bits to mix and match on my hats 🙂 don’t want to waste any of that felt.
5. Now that I have done a test hat, I’m pretty sure the next one will come out much nicer. So don’t go with the good wool on your first try (I didn’t) until you get the hang of it first.
6. I’m thinking some needle felting technique will be required to make it look really nice once it dries and shrinks a bit. So have a needle felting set handy to fix any small holes or thin spots or lumpy spots as needed. Also good to add some embellishments.
7. The wood placemat from goodwill left some discolored areas on the wool but it came out in the rinse phase. Honestly the bubble wrap did a better job so I’m not going to use the wood placement again. One tipster said to use a bamboo blind and this was the closest that I could find for a $1 lol just to try the technique out. I think I will stick with plain ol bubble wrap from the dollar store from now on.
…………
After a bit of needle felting (which works better on damp wool in my opinion, especially now that I have worked on this hat … damp wool and needles are best by far!) I was able to fill in some thin spots. Fold under the brim to make it double layer. Generally just work the hat into the form I liked. I decided not to do a second hot water heat shrink like the instructions said because I cheated and used Conestoga Chuck’s mega doggie professional hot air dryer with the lace netting over the hat to keep it from blowing away. This worked great! Good thing Conestoga Chuck doesn’t shrink like that when I dry him after his bath! Lol. Gotta have a professional mega doggie hair dryer when you live in snow country in the winter months! This thing has some mega wind velocity… hence the need to put the lace netting over the hat to keep from actually blowing the hat across the room. Yep… it’s that powerful! If I had a human hair dryer I would guess that would work good too lol. I also didn’t try the “put it in the dryer for a few minutes” method either… again because I had the mega doggie drier lol
Looking more like a hat now

I’m done for tonight. I’m going to let this finish drying. It’s just the slightest bit damp. Not enough to really tell when you touch it as it actually feels dry… until I put the lace band on and it became a bit damp. So I’m going to leave it like this on my plastic party hat/form to dry some more in front of the fan over night. I want to sew a linen liner inside the hat and then add some embellishments … but those will have to wait for tomorrow!
Since I did a lot of needle felting and it really helped form the hat nicely I decided to splurge and order a needle felting hat form … yes they actually make those and they are not that expensive!!! Should be here in a few days to try my hand at making the next hat and by then I should have this one all finished up. Stay tuned and I will be sure to post a follow up photo of the finished project.
Thanks Conestoga Chuck for letting me borrow your hair drier! 🙂
